Dr. Seuss' birthday is March 2nd and last year my kids and I went to a party for him. We had lots of fun, not the least of which involved making our own costumes. I decided to go as Daisy Head Mayzey, so I made a head piece to give me that flower-sprouting-out-of-my-hair look. Tell yourself how lucky you are, because I'm going to tell you how I did it! This is a seriously easy project that I did in about 20 minutes the morning of the party. If I can do it, so can you!
Materials
2 pieces of white copy paper
1 piece of yellow construction paper
3 green pipe cleaners
Scotch tape
Pencil
Ruler
Scissors
Bowl or small plate to trace the circumference of your daisy
Drinking Glass to trace the circumference of your flower's center
Bobby pins and a hair elastic to attach the flower in your hair.
Optional: Fabric headband to pin the flower to if your hair is too short to pull back.
Instructions
1. With both pieces of white paper stacked together, trace around the bowl or small plate and cut the circle out of both thicknesses of paper. Tape the 2 circles together in the center.
2. On the yellow paper, trace around the glass. Cut out the circle.
3. Center the yellow circle on the white circle and trace lightly around it. Set the yellow circle aside.
4. Use the ruler to draw lines criss-crossing through the center of the white circle. These will be your petals.
5. Take the 2 white circles still stacked together and cut along the lines, stopping at the edge of the inner circle. You may choose to round out the ends of the petals.
6. Tape the yellow circle to the center.
7. Holding the 3 green pipe cleaners together, begin twisting the pipe cleaners. To make leaves on the stem, make a loop in one of the pipe cleaners and twist it once or twice. Continue to twist the 3 pipe cleaners together. After a few more twists, make a leaf in another pipe cleaner. Twist them together again and then make a leaf in the 3rd pipe cleaner. Once you've twisted them down to the end, make a loop at each end of the stem and fold it up to a 90 degree angle.
8. Taping across one loop, attach the stem to the back of the flower.
Your flower is constructed!! Let's get it ready to wear.
1. Coil the stem around a lipstick tube or 2 fingers to make it into a spring. This will make the flower more stable and allow it to bounce. Originally I used a pencil, but I found that a slightly fatter spring worked better.
2. Ruffle the petals of your flower by gently bending each of the top layer of petals, one up, the next one down, etc. You don't need to do a hard crease, just a little pull. For the bottom layer, I bent every other one down and left the rest alone.
3. Bobby pin the flower into your hair. I found it stayed put very well when I pulled back the top of my hair with the hair elastic, slid the loop in the end of the stem up under the hair in the center, and then bobby pinned across the loop. If you have short hair, you could also wear a fabric headband (something with strong elastic, not too stretchy) and bobby pin the flower to that. You could also hot glue the flower to a plastic headband.
You're ready for your Dr. Seuss extravaganza!
~Ellie, Maîtresse des Fleurs de Papier

Friday, February 22, 2013
Monday, January 28, 2013
Valentine's Day Rescue!
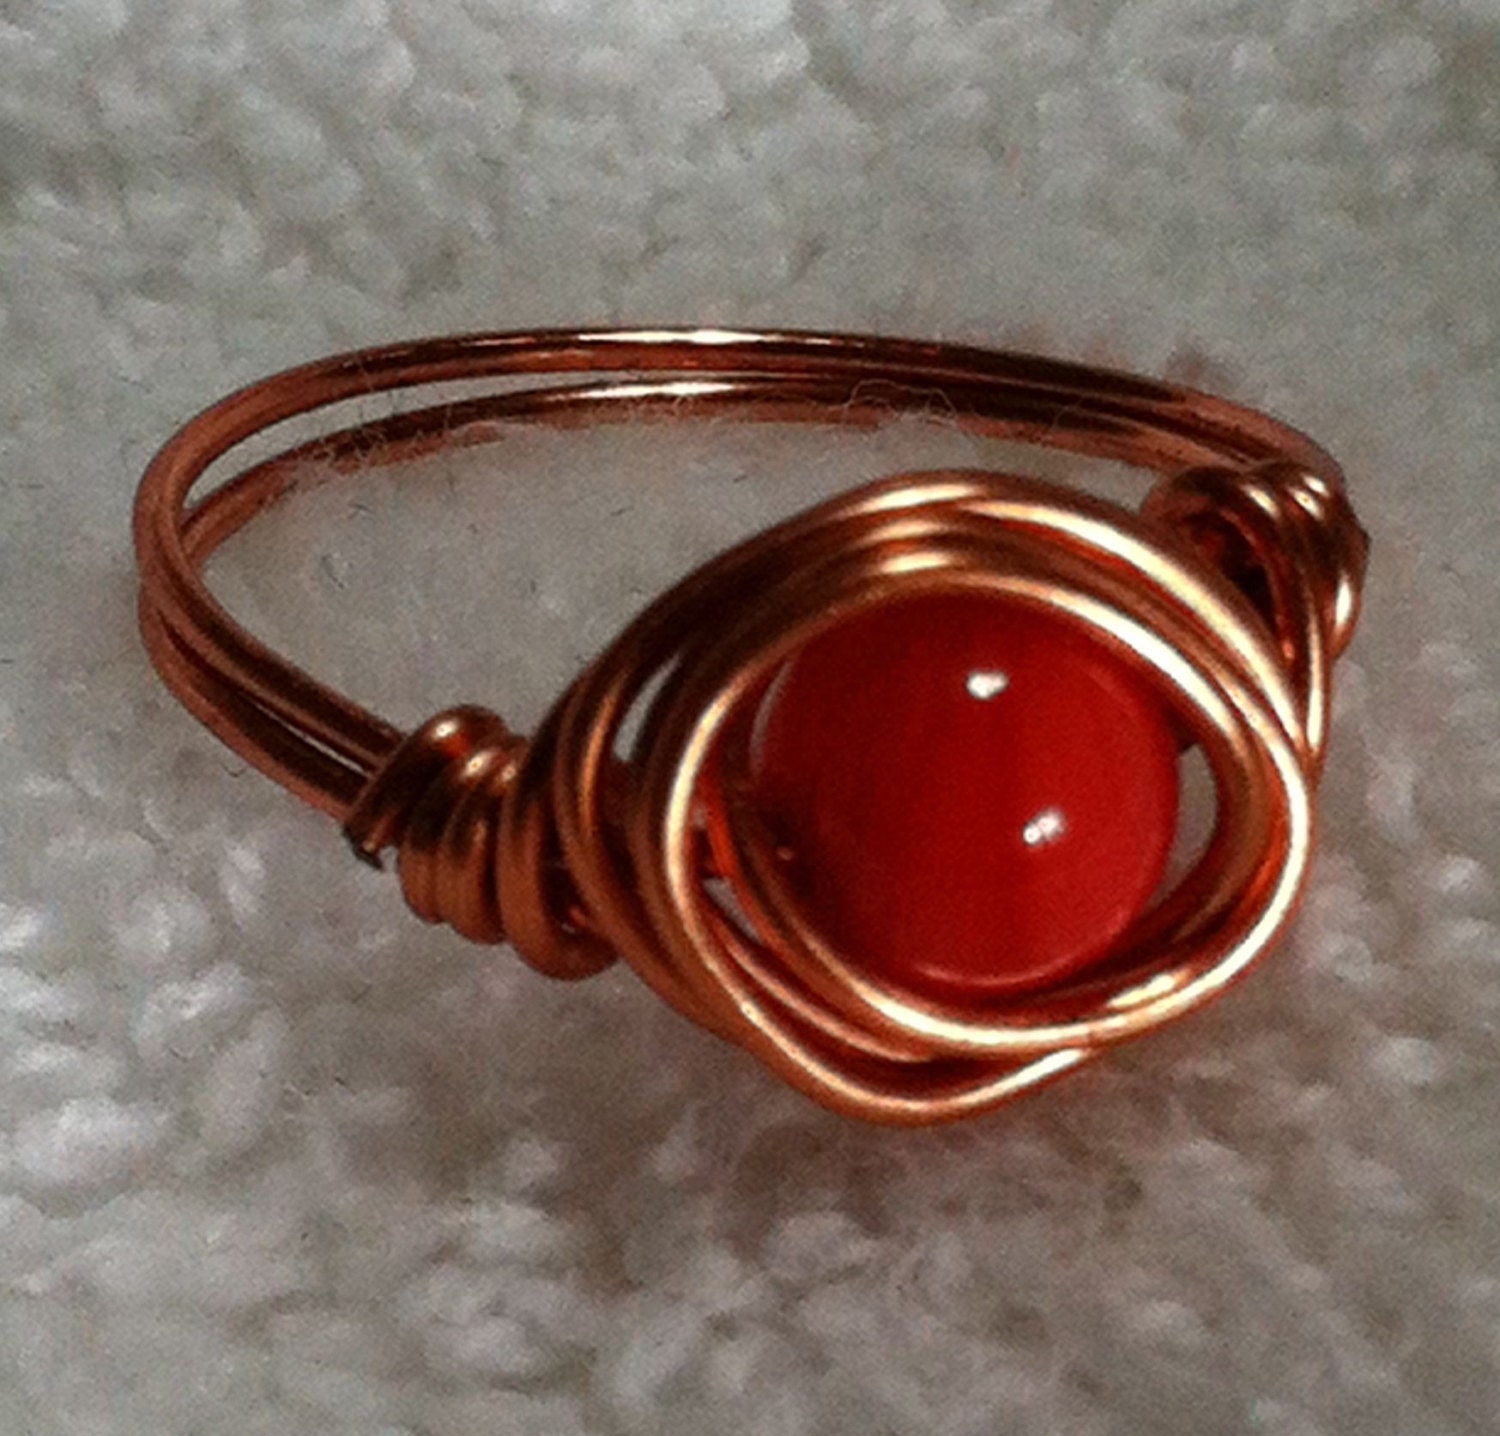
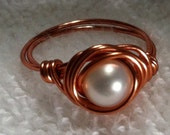
The day of love is nearly upon us. Are you ready? Exordium by ClockQuirks has some exquisite jewelry, all handmade, each item uniquely it's own. Our Exordium line is all about elegance. And with a range of prices for every budget, you can give your lady love a gift that is as unique as she is and still have money left over to take her to dinner.
Each of the below is just one example of dozens of beautiful pieces. You can also search in our shop by ring size, type of jewelry, or keywords like "crystal", "pearl", or "silver".
Each of the below is just one example of dozens of beautiful pieces. You can also search in our shop by ring size, type of jewelry, or keywords like "crystal", "pearl", or "silver".


Tuesday, January 22, 2013
Bright as a Button Ring
So, I've been doing wire wrap jewelry for a little while now and while wire and crystal are still my favorite kind of jewelry to make (so far), I recently tried using buttons in my rings and they were adorable! I proceeded to make a couple dozen more, trying out different color combinations, sizes and wire wrapping techniques. For your edification, ClockQuirkians, here are my favorites:
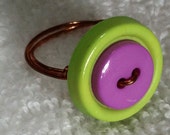
 This is the simplest design, but I love the colors. I tried a lot of different pairings, all of which I like, but these two got extra big smiles.
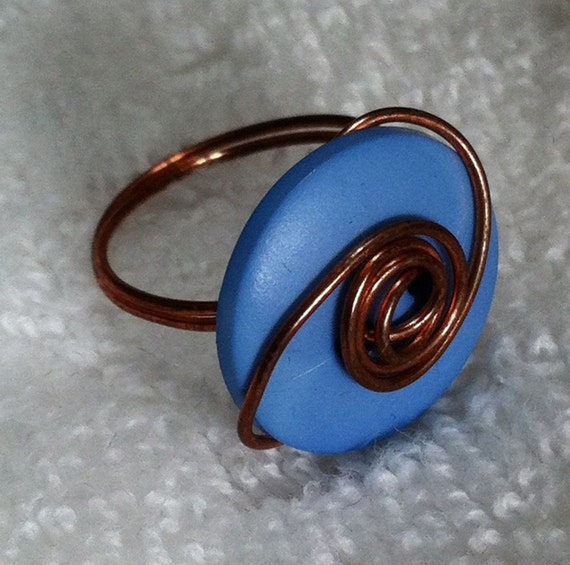 I love spirals in wire work, so I had to come up with a way to use it in my button rings. Love how it turned out!
 More spirals, but a different kind this time. Coils are such an aesthetic design detail and so much fun to make!
We have a large selection of button rings available in our Tweely shop.
We have a large selection of button rings available in our Tweely shop.
Tuesday, January 15, 2013
Sock Monkey in the Middle
Bonnie (Mom to me) has proven that my status as Maitresse de Crochet is an inherited title! She has created the cutest animal hats, and she did it with her crochet hook! They were originally made as baby gifts for several friends who have brand new little ones, but they were just too cute to keep to herself. Now you can find them in the Tweely shop here. Too cute!!
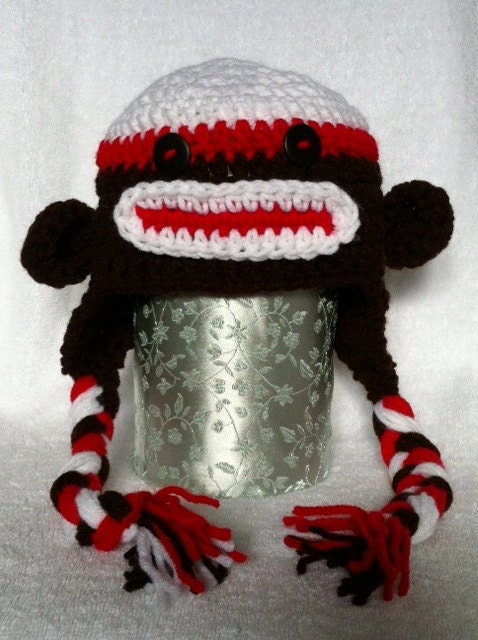
 It all started with a sock monkey. You'll notice in our shop that sock monkeys are kind of a thing for us. When Bonnie needed a baby gift, she decided to try making a hat and what better inspiration than our buddy the sock monkey?
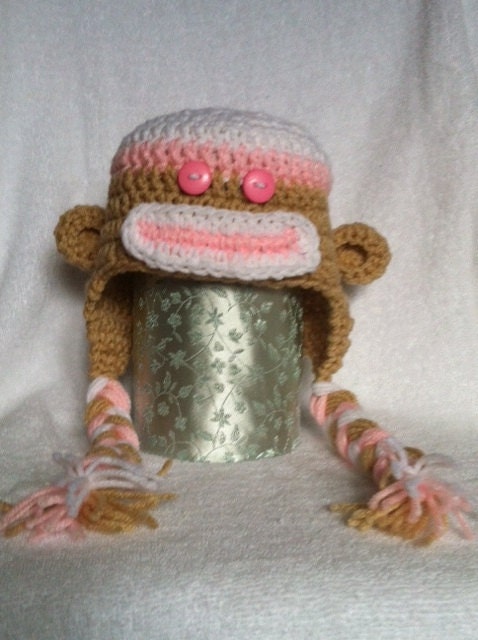
We have a special soft spot for pink sock monkeys because we give a portion of the proceeds to breast cancer research. They were the inspiration for this pink monkey hat made for a little baby girl.
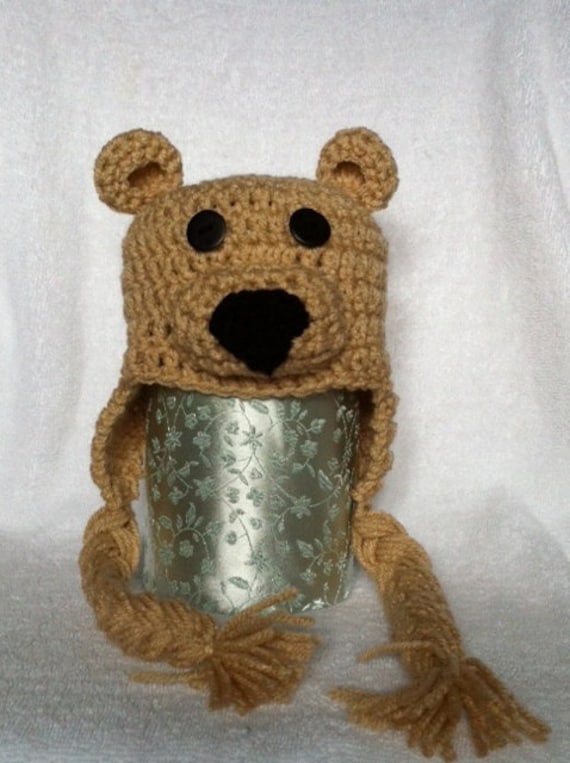
The monkeys came out so great that a bear seemed the obvious next step. This adorable teddy hat is as cozy as it is cute!

This was a total brain wave on Mom's part. I love his ears!! And zebra stripes are soooooo fashionable. :-)
It all started with a sock monkey. You'll notice in our shop that sock monkeys are kind of a thing for us. When Bonnie needed a baby gift, she decided to try making a hat and what better inspiration than our buddy the sock monkey?We have a special soft spot for pink sock monkeys because we give a portion of the proceeds to breast cancer research. They were the inspiration for this pink monkey hat made for a little baby girl.
The monkeys came out so great that a bear seemed the obvious next step. This adorable teddy hat is as cozy as it is cute!
This was a total brain wave on Mom's part. I love his ears!! And zebra stripes are soooooo fashionable. :-)
Subscribe to:
Posts (Atom)